
In a typical Alfresco implementation it is quite common to develop one or more custom actions to encapsulate a set of operations that need to be performed against a folder or document. Custom actions can be called from folder rules, added to the user interface, or called programmatically from web scripts. To learn more about developing custom actions, check out my tutorial on custom actions.
When actions are added to the Share document library or document details page they operate against a single folder or document. But the Share document library also lets users select multiple objects and then run actions against them. Out-of-the-box examples are things like “Download as Zip”, “Copy”, “Move”, “Start Workflow”, and “Delete” as shown in the screenshot below.
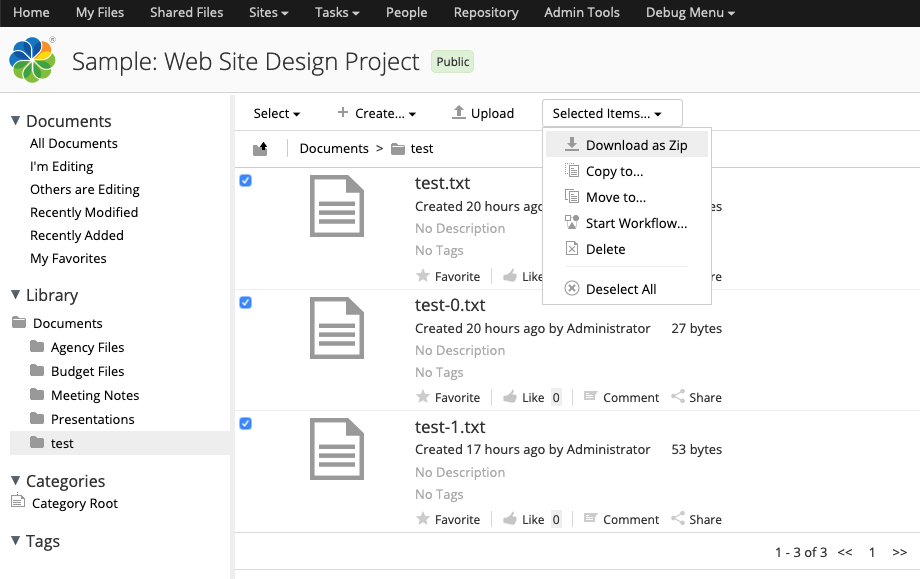
This blog post explains how you can add your own custom actions to the “Selected Items” menu in Alfresco Share.
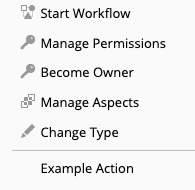
First, I’m going to assume that you already have a custom action that works when invoked from a rule or from the UI and you just need it to work from the Selected Items menu. I’ll call mine “Example Action”. It doesn’t do anything exciting except log the node reference of the object the action is run against. Here it is sitting in the list of document actions on the document details page:
Now the goal is to add Example Action to the “Selected Items” menu so that the action will run against each object the user has selected. If you want to skip right to the working project on GitHub that’s fine, otherwise, read on for a step-by-step…
Step 1: Extend the multi-select configuration
I used a Share extension to add some custom configuration to get Example Action to show up in the document library browse list and the document details page. I’ll add additional config to extend the out-of-the-box “multi-select” list of action links:
<config evaluator="string-compare" condition="DocumentLibrary">
    <multi-select>
        <action type="action-link" id="onExampleAction" label="actions.example-action"></action>
    </multi-select>
</config>
The action label is a property bundle key that has the text I want to appear in the menu. The action ID, onExampleAction, is the name of a client-side JavaScript function to be called when the user selects the menu item.
I’ll implement the onExampleAction function in a file named custom-actions.js. I need to get Share to include that file as a dependency, so I add an additional config block:
<config evaluator="string-compare" condition="DocLibCustom">
    <dependencies>
        <js src="resources/multi-select-demo-share/custom-actions.js"></js>
    </dependencies>
</config>
That’s all I need to change in my Share extension XML file. See the full file on GitHub.
Now let’s look at the client-side JavaScript.
Step 2: Implement the client-side JavaScript
In the previous step I configured Share to add an action to the “Selected Items” menu that invokes the onExampleAction function when clicked and I told it where to find the function. Now I need to implement the function. To do that, I use YUI to fire a “registerAction” event, passing in an object with two properties: one is the name of my action and the other is a function to execute:
(function() {
      YAHOO.Bubbling.fire("registerAction",
          {
              actionName: "onExampleAction",
              fn: function custom_DLTB_onExampleAction(assets) {
                  // Function logic goes here
              }
          });
})();
Note that “onExampleAction” matches whatever I specified as the action ID in the multi-select config. It has nothing to do with the name of the Java class that implements the back-end action executer.
Within that function body you could do whatever you want. Maybe you need to capture some additional data from the user, so you present a modal. Maybe you want to display a progress bar. It’s up to you.
In my case, I just need to send the selected nodes to the back-end. Remember that I already have a working action. Mine is a Java class named ExampleAction that writes a log message with the node reference of the node the action is running against.
It would be nice if I could just somehow call that action and hand it my list of selected node references, but the execute method in the ActionExecuter interface only accepts a single node. Plus, we’re currently sitting in client-side JavaScript delivered by Share that needs to invoke an action in the Alfresco back-end–a completely separate web application. I need a way to asynchronously make an HTTP call to the Alfresco back-end from here.
The solution is to call a custom repository-tier web script with the list of selected node references, and use the web script controller to invoke the action for each of the node references in the list.
Alfresco provides a utility for making asynchronous posts and a constant that has the Share proxy URI. (The Share proxy avoids making the call from the browser all the way back to the Alfresco back-end, which could be running on a different host.) All I have to do is provide the path to the web script and the list of assets:
Alfresco.util.Ajax.jsonPost(
    {
        url: Alfresco.constants.PROXY_URI + "ecmarchitect/example-action-multi",
        responseContentType: "application/json",
        dataObj: assets,
        successMessage: this.msg("message.example-action.success"),
        failureMessage: this.msg("message.example-action.failure"),
        successCallback:
            {
                fn: function exampleSuccess() {
                    console.log("Success");
                },
                scope: this
            },
        failureCallback:
            {
                fn: function exampleFailure() {
                    console.log("Failure");
                },
                scope: this
            }
});
In the above JSON POST I am also setting a success message and a failure message so that the Share user sees feedback after the web script is invoked. Just to show you how it works, I’m also including success and failure callback functions. Mine just write a message to the browser developer console, but you could do whatever you need to, such as display data that came back in the web script response.
You can review the full source of custom-action.js or go on to the next step, which is to implement the web script.
Step 3: Implement the web script
I need a web script that will accept the list of selected nodes and invoke the action for each one. Webscript controllers can be written in either JavaScript or Java (tutorial) but I almost always write them in Java these days.
You can see the full source of ExampleActionMulti.java on GitHub–I am just going to include the relevant snippet here:
Action exampleAction = actionService.createAction("example-action");
JSONArray dataObj = (JSONArray) content;
for (int i = 0; i < dataObj.length(); i++) {
    JSONObject obj = (JSONObject) dataObj.get(i);
    NodeRef nodeRef = new NodeRef((String) obj.get("nodeRef"));
    if (nodeService.exists(nodeRef)) {
        actionService.executeAction(exampleAction, nodeRef);
    }
}
Alfresco Share handed my client-side JavaScript function an array of node objects which I then post to this web script. So the web script iterates over that array and grabs the node reference string to construct an actual NodeRef object. I use the node service to make sure that node ref actually exists, then I execute the action against it.
Other parts of the web script that I’m not showing here are the web script descriptor, the web script view template, and the Spring bean that injects the node service and action service dependencies into my controller.
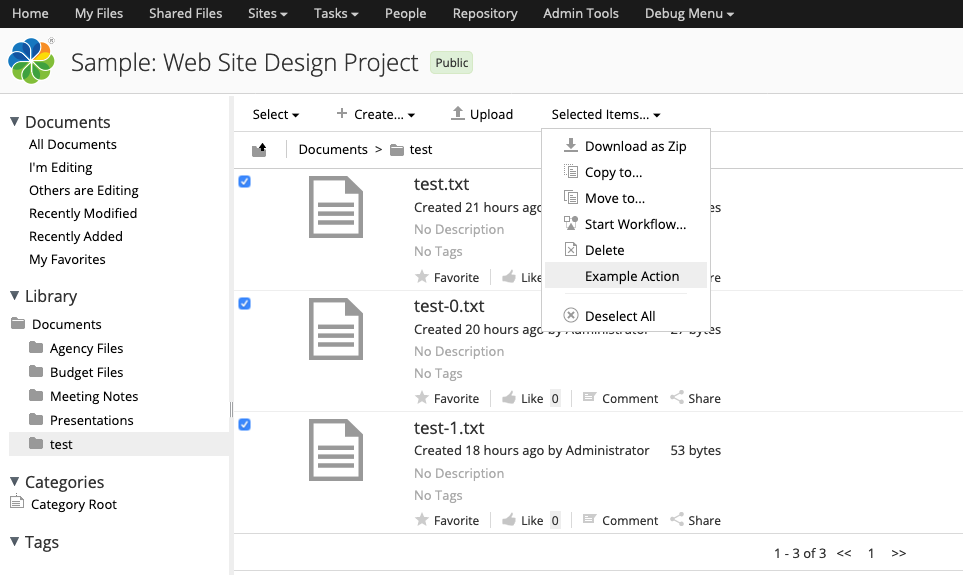
Step 4: Test
With everything in place, I’m ready to test. My project was bootstrapped with the Alfresco SDK, version 4.1.0, so it uses Alfresco Community Edition 6.2.0 by default and runs locally using Docker. After running run.sh build_start I can log in to Share, go to a site’s document library, selected multiple objects, and see this in the Selected Items menu (click to enlarge):
And I can see this in the log:
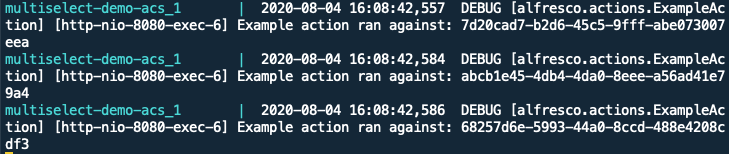
That’s it. Now you know how to add your own custom actions to the Selected Items menu in Alfresco Share.