A forums user recently asked how to use the “quick share” feature from their own code. The implementation is easy to figure out, but I thought illustrating the steps you should use to dig into it would be instructive, because it is the same general pattern you would follow to learn how anything works in Alfresco.
What is Quick Share?
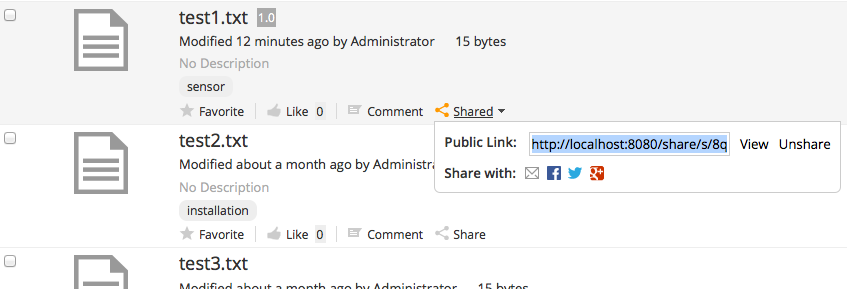
Quick Share makes it easy for end-users to share any document with anyone whether or not that person is a member of a site or has specific permissions on a document. Clicking the “Share” link in the document library or document details displays a dialog with a shortcut URL that will allow anyone to see a preview of the document. If that person also has access to the document, they can optionally download the document as well.

How does this work behind-the-scenes? Let me show you how to figure that out. These steps can be used to demystify any Share-based functionality you need to learn more about.
Step 1: Determine the call Share makes to the repository
Share is just a front-end web application. It always talks to the repository via HTTP. Step 1 is to take advantage of that. Use Firebug or a similar browser-based client-side debugging tool to watch the network traffic between Share and the repository. If you turn that on you’ll see that when you click “Share” the browser makes a POST to:
http://localhost:8080/share/proxy/alfresco/api/internal/shared/share/workspace/SpacesStore/f70e2505-5002-42b7-a71b-2e09aca0c2d0
What comes back is JSON representing the quick share ID:
{

"sharedId": "oD9wUfV_SPS9eG-CFEpwbQ"

}
The first part of that URL, “/share/proxy/” is the Share proxy. It simply forwards the request on to the repository tier. In this case that’s a web script residing at “/alfresco/api/internal/shared/share”. The rest of the URL is the node reference of the node being shared.
As a side-note, unsharing works similarly. Share sends a DELETE to http://localhost:8080/share/proxy/alfresco/api/internal/shared/unshare/oD9wUfV_SPS9eG-CFEpwbQ
That returns JSON with the return flag:
{

"success" : true

}
So now you know how Share interacts with the repository. The next step is to dig into the repository tier implementation.
Step 2: Look at the repository web script
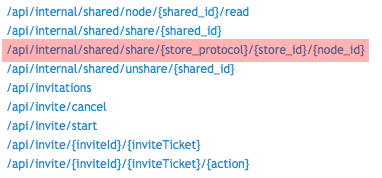
Now that you know the repository web script URL you can go to the web script console, http://localhost:8080/alfresco/s/index, to learn more about the web script. I find searching by URI to be easiest. Here’s the web script in the list:

Clicking on that link shows high-level information about the web script. Make note of this web script’s lifecycle–it is set to “internal”. That means you shouldn’t call it from your own applications or customizations. If you do, you may be creating a future maintenance headache because the web script may change without warning.
In this case, we don’t want to call the web script, we want to know what the web script is doing. Clicking on the web script ID will tell you more about how it is implemented. Here’s the URL where you’ll end up:
http://localhost:8080/alfresco/s/script/org/alfresco/repository/quickshare/share.post
This page is really helpful because it shows you the details about the web script implementation, including its views and controllers.

In this case, the web script uses a Java controller implemented in the following class:
org.alfresco.repo.web.scripts.quickshare.ShareContentPost
The next step is to dig into the web script implementation.
Step 3: Read the source code for the implementation
If you search through your Alfresco source code you’ll find ShareContentPost.java. It’s a very simple web script. Here’s the line that does the work:
QuickShareDTO dto = quickShareService.shareContent(nodeRef);
Cool, so there is a QuickShareService. I’m going to make a time-saving leap here which is to assume that anything named like FooService is likely defined as a Spring bean that I can inject in my own code.
Step 4: Find the QuickShareService bean
If you’re going to write some Java code that leverages the QuickShareService you’ll probably want to see the Spring bean configuration for that bean. To find that, go into $TOMCAT_HOME/webapps/alfresco/WEB-INF/classes/alfresco and do a grep for QuickShareService. You’ll see that it is defined in quickshare-services-context.xml.
Now you have a Spring bean ID you can use as a dependency in your code.
Step 5: Understand the content model
You might choose to do this in an earlier step, but if you haven’t already, you should use the node browser in Share to see what happens to a node when it is shared just in case you need to make use of any of that information. By doing that you’ll see that a shared node has an aspect called qshare:shared. When it gets shared, the qshare:sharedId and qshare:sharedBy properties get set. In this example, the QuickShareService handles that for you–you shouldn’t have to set those manually. But it is good to know those properties are there in case you need them.
If you needed to learn more about the content model you could grep for that aspect ID, qshare:shared, in $TOMCAT_HOME/webapps/alfresco/WEB-INF/classes/alfresco/model to figure out where the model XML is.
Now you have everything you need to make use of this functionality in your own code. For example, if you wanted to create a rule action that automatically shared everything matching a certain criteria, you could easily do that by injecting the QuickShareService into your action and then calling the shareContent() method (see my actions tutorial).
This example covered the Alfresco Quick Share feature in the Alfresco Share web client, but you can use these steps to dig into any functionality in Alfresco Share that you need to deconstruct.
