Category: Alfresco Developer Series

The Alfresco Developer Series is a set of articles aimed at getting you up-to-speed on the Alfresco platform.

Display a chart in Alfresco Share: Part Two

In Part One, you saw how to create an Alfresco Share dashlet that uses out-of-the-box Aikau widgets to chart data. In that example, the data came from a repository tier web script.

In this blog post, Part Two, you’ll see how to fetch the data from an external API called from the Share tier. The external API could be anything, but for this example we’ll implement it with Spring Boot. We’ll add a Docker module to the project so that the Spring Boot application will run in a container alongside the Alfresco and Share containers that are part of all Alfresco SDK projects. Finally, we’ll secure the external API so that only authenticated Alfresco users can invoke it.

Steps

This code is available in GitHub. Just like Part One, each of the steps below is tagged. After you clone the repository you can switch between steps by doing git checkout step4 or git checkout step5 etc. I’m starting with “Step 4” because Part One covered steps 1 – 3.

If you are going to follow along, and you haven’t already, clone the project:

git clone https://github.com/jpotts/alfresco-share-chart-example.git

Step 4: Add an external REST API with Spring Boot

If you are following along:

git checkout step4

The existing code invokes a web script in the repository tier that returns sales data. A more likely case is that the sales data comes from a REST API running external to Alfresco. In this step we’ll build a small Spring Boot application that simulates the external sales data API. To make things simple, we’ll add the new application as an additional module to the alfresco-share-chart-example project.

Switch to the root of the alfresco-share-chart-example project and create a new directory named alfresco-chart-example-api.

Within that, add a new pom.xml file that pulls in the Spring Boot dependency:

There are many ways to organize a Spring Boot app. I like to create separate files for my application, model, controllers, and services:

We’ll set the application port to 8000 in the application.properties file:

Test by switching into alfresco-chart-example-api and running mvn clean install. Then, run java -jar target/alfresco-chart-example-api-1.0-SNAPSHOT.jar. Once the app comes up you should be able to invoke:

http://localhost:8000/api/salesData

And see the JSON response.

Use ctl+c to stop the application.

Step 5: Create a Docker module for the example API

If you are following along:

git checkout step5

The Alfresco SDK uses Docker to run Alfresco and Alfresco Share, so we’ll do the same. To do that, create a new module directory called alfresco-chart-example-api-docker.

Within that, add a new pom.xml file. This pom.xml pulls in the application created in the previous step as a dependency so that it can be easily copied to the Docker image.

Now add a Dockerfile that builds the image. There are a lot of ways you can deploy Spring Boot apps with Docker. In this example, we’ll just use an Alpine Linux image with the JDK, and launch the Spring Boot app directly from the JAR, just like you did when you tested the app in the previous step.

When we start Alfresco with the run.sh script that is included with the SDK it builds the Alfresco containers, starts them up, and networks them together using Docker Compose. Our container should be included in that, so we’ll update the Docker Compose file that already exists off the root of the project source code and add corresponding tasks to the run scripts:

Finally, make sure to add the two new module directories to the root pom.xml:

Test by changing to the alfresco-chart-example-api-docker directory and running mvn clean install. Then, switch to the root of the project source and run ./run.sh reload_api or run.bat reload_api. This should cause a Docker container to start up with the Spring Boot application running. Again, you should be able to invoke:

http://localhost:8000/api/salesData

And see the JSON response.

Run ./run.sh stop or run.bat stop to stop the container.

At this point you should be able to do ./run.sh build_start or run.bat build_start to start up Alfresco, Alfresco Share, and the Spring Boot Example API, all at once.

Step 6: Update Share to fetch data from the API

If you are following along:

git checkout step6

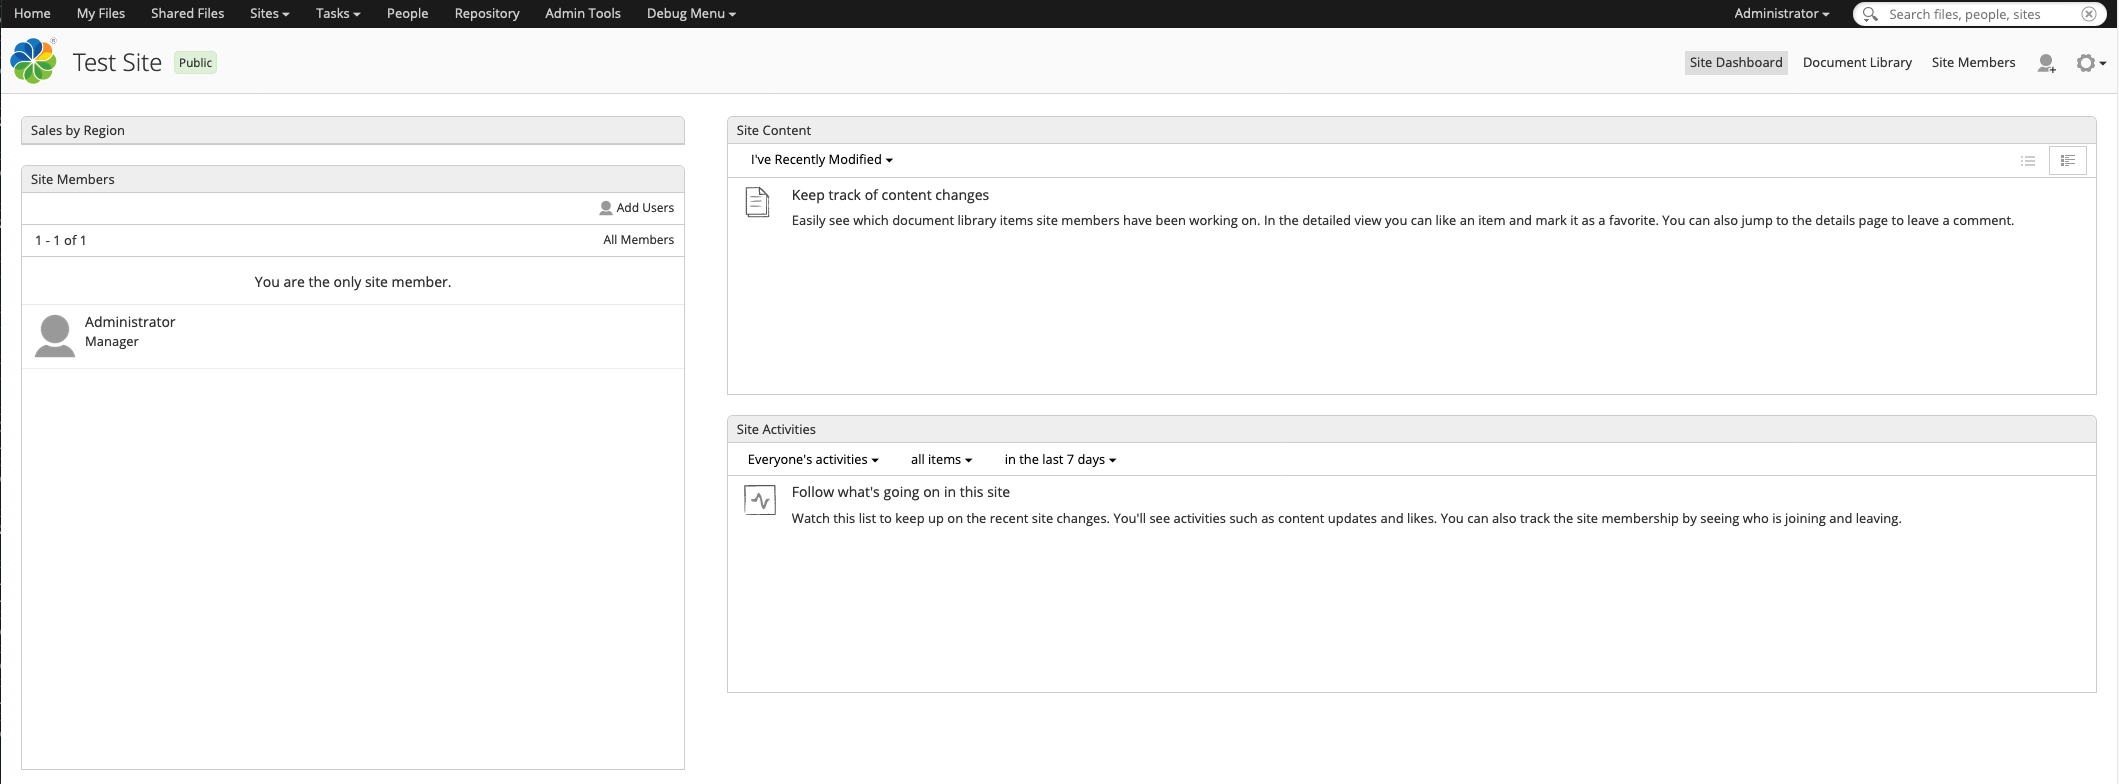
Now Alfresco, Share, and the API are running, but the Share chart dashlet is still pulling its data from the repository tier web script. It’s time to update the dashlet to instead pull its data from the Spring Boot example API.

First, create a web script that the chart dashlet will call to get its data. This is similar to the one we created in the repository tier in Part One, but this one is going into the Share tier. You could run this in the repository tier, but putting it in the Share tier saves us one hop.

The web script calls the external API and returns the data in the format that the dashlet is expecting. To make that call, we’re using a built-in root-scoped object called “remote” that is able to call external REST APIs:

var connector = remote.connect("example-api");
var dataString = connector.get("/api/salesData?ticket=" + ticket);

That connector ID, “example-api”, refers to Share configuration that includes the actual host that is being connected to:

In this example, the API is running as a Docker container, so the endpoint-url refers to the Docker Compose service name:

<endpoint-url>http://alfresco-chart-example-api:8000</endpoint-url>

Finally, the CustomReportService we created in Part One is still referring to the repository tier web script. It needs to be updated to instead call the new Share tier web script:

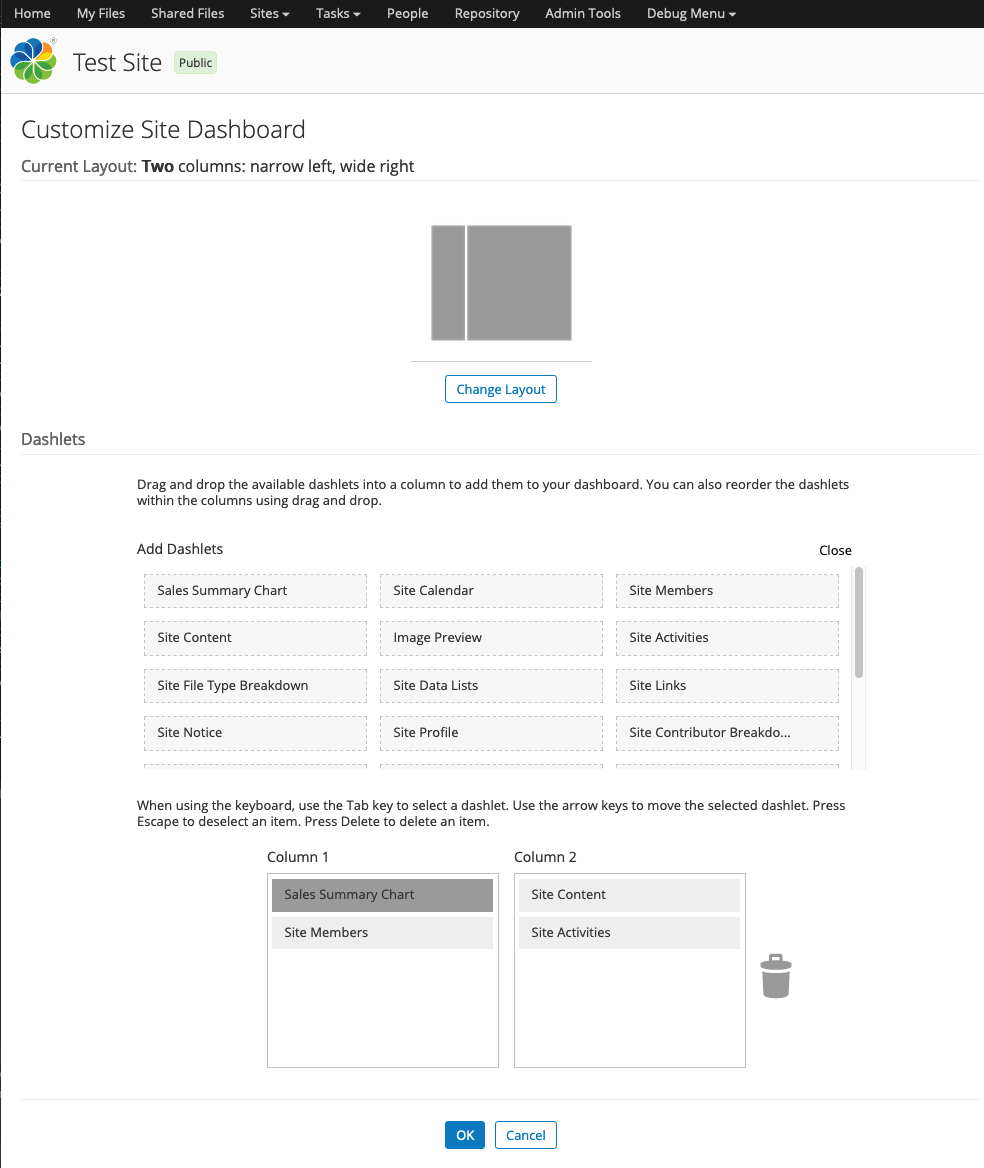
You’ve made changes to Alfresco Share, so do ./run.sh reload_share or run.bat reload_share to rebuild and run the Share container. When it comes back up, go to Share at http://localhost:8180/share, log in, and go to the test site that has your chart dashlet.

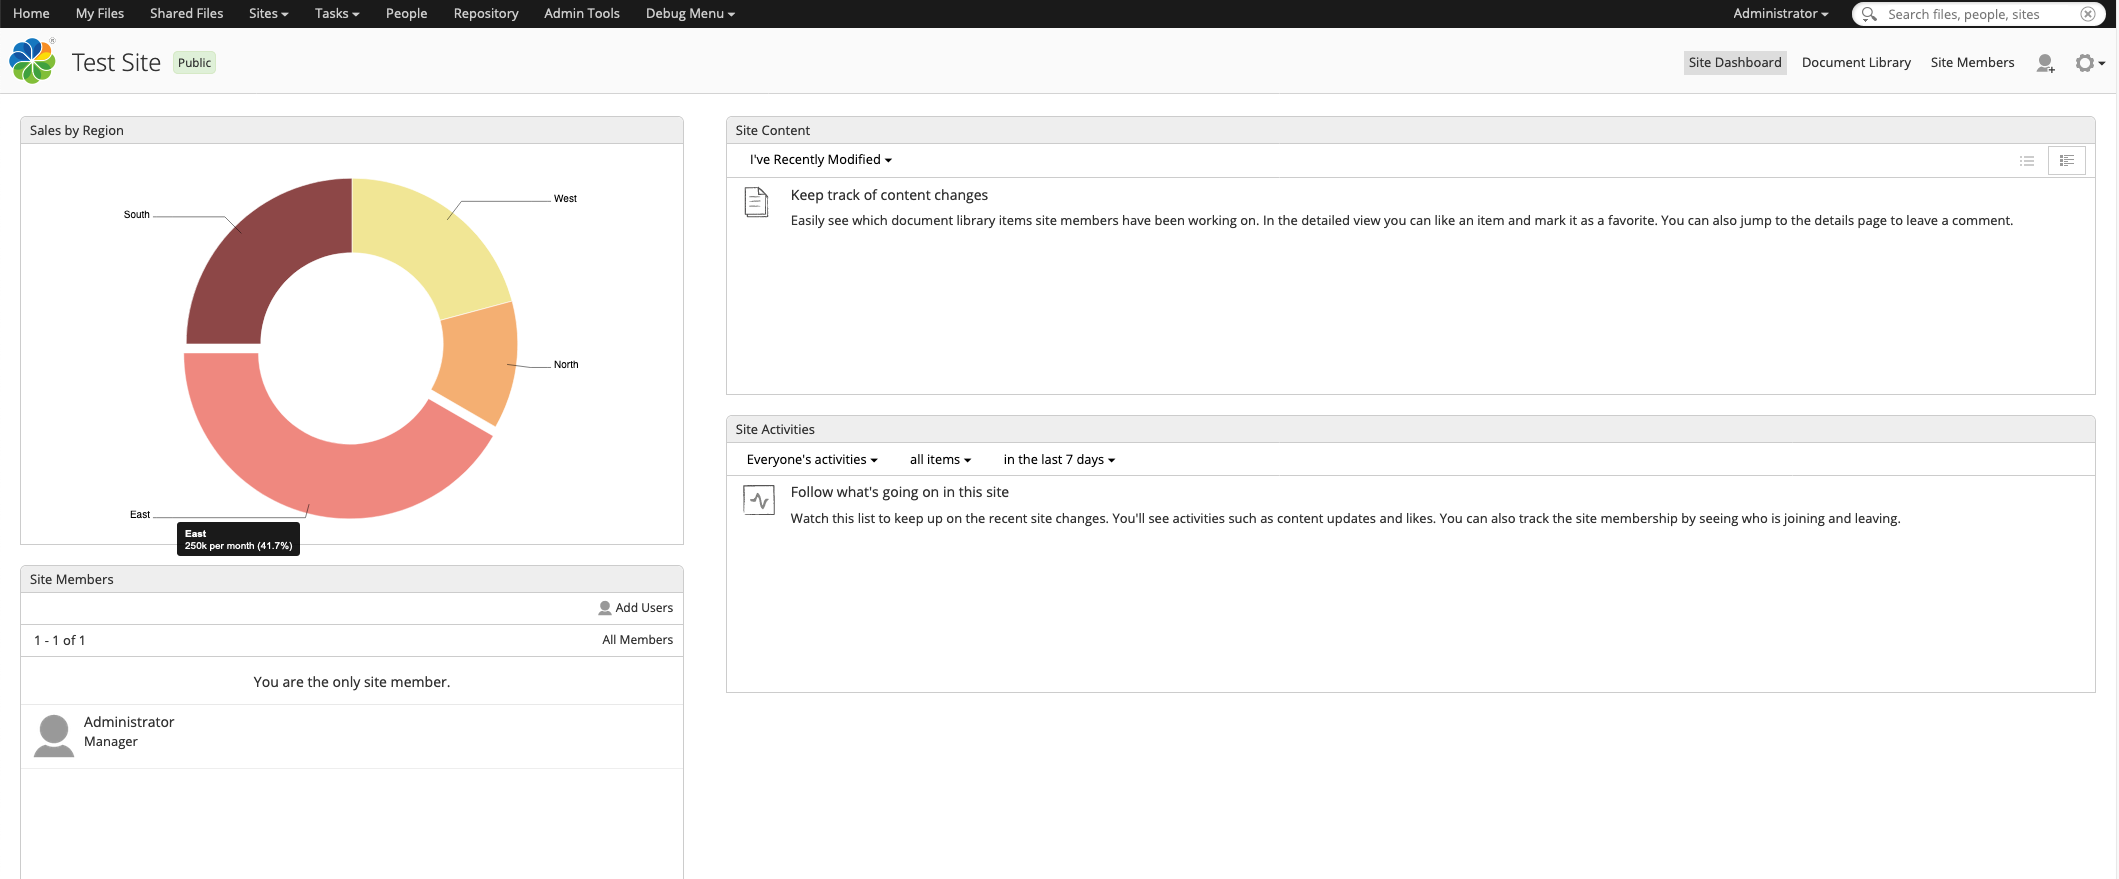
The chart dashlet should now display data coming from the Spring Boot API.

Step 7: Secure the API to only allow requests from authenticated Alfresco users

If you are following along:

git checkout step7

The Alfresco Share sales summary dashlet is now pulling data from an external REST API. If you don’t mind that anyone can fetch that data from the REST API at any time, there is no need to go any further. In this example, let’s assume that only authenticated Alfresco users should be allowed to retrieve data from the REST API. How can we modify the API and the web script that calls it to meet that requirement?

First, let’s add a new service to alfresco-chart-example-api that knows how to validate Alfresco tickets:

The service uses the Alfresco 5.2 public REST API to ask Alfresco if the ticket is valid.

With that in place, the SalesDataController can be updated to validate the ticket before returning a response:

If you do a run.sh reload_api or run.bat reload_api at this point and try to invoke http://localhost:8000/api/salesData you should see a 401 returned, which is exactly what we want–if you don’t have a valid ticket you cannot invoke the sales data API.

To test a successful call, use curl to grab a ticket:

jpotts@Metaversant alfresco-share-chart-example % curl -X POST -H 'content-type: application/json' http://localhost:8080/alfresco/s/api/login -d'{"username":"admin", "password":"admin"}'
{
    "data":
    {
        "ticket":"TICKET_01b44089022f98740c3eb27009f49e787f9fb213"
    }
}

And then pass the ticket to the sales data API and the response should be successful:

jpotts@Metaversant alfresco-share-chart-example % curl "http://localhost:8000/api/salesData?ticket=TICKET_01b44089022f98740c3eb27009f49e787f9fb213"
[{"region":"North","amount":125},{"region":"South","amount":125},{"region":"East","amount":125},{"region":"West","amount":125}]

So far, so good.

The last step is to modify the Share tier web script that fetches the sales data from the API to pass along the ticket. One gotcha here is that Share does not have direct access to the ticket, so we’ll first add a tiny repository tier web script that returns the ticket:

And then we can modify the Share tier web script to fetch the ticket from the repository tier and pass it along to the sales data API:

The controller uses the same “remote” root-scoped object it used previously, but it relies on the default connector, which is the Alfresco repository web script connector, to fetch the ticket:

// Need to get the user's ticket from the repo
var ticketString = remote.call("/custom/ticket");
var ticketResponse = jsonUtils.toObject(ticketString);
var ticket = ticketResponse.ticket;

// Get the sales data from the API
var connector = remote.connect("example-api");
var dataString = connector.get("/api/salesData?ticket=" + ticket);

You’ve now made changes to both the repository tier and the share tier. Either reload each one with ./run.sh reload_acs and ./run.sh reload_share or do a ./run.sh stop to stop all the running containers followed by a ./run.sh build_start to start everything back up.

That’s it. You’ve now got an external API that returns data only to authenticated Alfresco users and a Share dashlet that displays that data in a pie chart.

Display a chart in Alfresco Share: Part One

The other day a customer asked how much trouble it would be to chart some data in an Alfresco Share dashlet. The data comes from a non-Alfresco REST API.

The answer is that it is relatively easy to do. That’s because Alfresco Share ships with some basic out-of-the-box chart widgets called BarChart, DonutChart, and PieChart. You may have seen examples of dashlets that use PieChart if you’ve ever added the Site Content Breakdown or Site Contributor Breakdown dashlets to your Share dashboard.

In this blog post, I’ll show you how to make your own chart dashlets by shamelessly stealing Erik Winlöf’s code that implements the Site Content Breakdown dashlet and modifying it for our own purposes to show sales data, by region, in a dashlet. In part one, the data is fetched from a repository tier web script. In part two, the data comes from a Spring Boot app.

Steps

This code is available in GitHub. Each of the steps below is tagged. After you clone the repository you can switch between steps by doing git checkout step1 or git checkout step2 etc.

If you are going to follow along, clone the project:

git clone https://github.com/jpotts/alfresco-share-chart-example.git

Then, checkout step0:

git checkout step0

And startup the project using Docker and Docker Compose:

./run.sh build_start

This will start up Alfresco using Docker with no customizations made at this point.

Step 1: Add a simple API to return the data to chart

If you are following along:

git checkout step1

If Alfresco is already running:

./run.sh reload_acs

We want to build a dashlet that can chart data fetched from an API source. So, to start, we’ll add a repository tier web script that returns data as JSON. Once the chart is working we can swap that out to an external data source.

The files that make up the web script are:

With the web script in place, invoking http://localhost:8080/alfresco/s/custom/data will return a JSON response with sales broken down by region, like this:

     {
         "resultset": [
           [
                 "West", 125
             ],
             [
                 "North", 75
             ],
             [
                 "East", 250
             ],
             [
                 "South", 150
             ]
         ],
         "metadata": [
             {
                 "colIndex": 0,
                 "colType": "String",
                 "colName": "name"
             },
             {
                 "colIndex": 1,
                 "colType": "Numeric",
                 "colName": "sum"
             }
         ]
     }

The format of the JSON is what the chart component expects–it includes a resultset property, with a list of data values, and a metadata property, which describes the data types found in the result set.

If you need exact steps on how to create a web script, see my webscripts tutorial.

Step 2: Add a dashlet

If you are following along:

git checkout step2

If Alfresco is already running:

./run.sh reload_share

In this step, add a dashlet. Share supports the old “Surf” way to add dashlets as well as the newer “Aikau” way to add a dashlet. Because we’re going to use an Aikau widget for the chart, we’ll use the Aikau approach for the dashlet.

Dashlets are implemented using web scripts, so we’ll need a descriptor, controller, and view template:

This is an Aikau dashlet, so in addition to the dashlet web script, we need an Aikau widget, implemented in client-side JavaScript, that sets up the dashlet:

Now log in to Share at http://localhost:8180/share, create a test site, and customize the site’s dashboard to add the newly-created dashlet.

Customize dashlet page

It doesn’t have anything in it yet because we need to define a service to fetch the data and a widget to display it. That’s the next step.

An empty dashlet

Step 3: Add a widget and a service

If you are following along:

git checkout step3

If Alfresco is already running:

./run.sh reload_share

The last step is to add an Aikau service to fetch the data and an Aikau widget to display the data fetched by the service. The widget will use the out-of-the-box pie chart widget to display the chart.

First, we write an Aikau service to fetch the data from the API and publish it to a topic:

Then, we write an Aikau widget that subscribes to the topic and renders the chart using the PieChart widget:

The dashlet controller we implemented earlier needs to be updated to refer to the new service:

And the Aikau dashlet code needs to be updated to point to the new widget:

Now when the dashlet renders, it fetches the data from the repository tier web script and presents it in a pie chart.

Hovering over each slice in the pie chart produces and overlay with the detailed data.

Share dashlet with a pie chart that pulls data from a REST API

Part Two Preview

In Part Two, we’ll create a little Spring Boot application that the dashlet will call to fetch its data instead of fetching it from the repository tier. The Spring Boot app will authenticate the request using the authenticated Alfresco user’s ticket, so that only authenticated Alfresco users can fetch the data from the API.

Alfresco Developer Series Tutorials for SDK 4.0

Back in February, when SDK 4.0 was still in beta, I upgraded the Alfresco Developer Series tutorials on a branch to help early adopters learn how to use the platform. I was holding off on merging the branch into master until SDK 4.0 was out of beta and until I was seeing more end-user adoption of Alfresco 6.x.

Since then, SDK 4.0 has left beta. The vast majority of my customers are still running 5.2, but I’m seeing enough interest in 6.x on StackOverflow and in the forums that I decided it was time to merge to master.

If you are looking for the older tutorials based on SDK 3.0, they are still there–just use the SDK-3.0.1 tag.

In addition to the source code projects, the tutorial content itself also changed slightly. Those HTML pages have been re-generated, published, and linked to from the Alfresco Developer Series home page.

Now when developers come across the tutorials they’ll be referencing source code and instructions that are up-to-date with the latest SDK.

Alfresco Developer Series Tutorials Upgraded to SDK 4.0

Alfresco SDK 4.0 has not been released yet, but it is in beta and developers are starting to use it.

To help developers who want to learn the platform using SDK 4.0 and Alfresco 6, I’ve created an sdk-4.0 branch on the Alfresco Developer Series tutorials project. The tutorials on that branch have been upgraded to the new SDK 4.0 structure.

Aside from the project reorganization and the introduction of the Docker modules the underlying code did not have to change.

In addition to the tutorial source code projects, I also updated the tutorial content bodies to reflect the Docker and Docker Compose features of SDK 4.0 and the minor changes regarding how projects are run and tested. While I was in there I enhanced the markdown with syntax highlighting for code snippets.

Once SDK 4.0 goes GA I will merge the sdk-4.0 branch in the tutorials project into master. Those needing tutorials that leverage the old SDK 3.0.1 will still be able to get them via the sdk-3.0.1 tag.

Incidentally, I used the Alfresco SDK Upgrader script to upgrade these projects and it saved me a lot of time. If you want to know more about upgrading your 3.0 projects to 4.0, either manually or via the script, see this blog post on upgrading.

So, if you are going to learn Alfresco using the latest release, give the updated tutorials a try. If you find any issues, please create an issue on GitHub, or, better yet, fix the issue and open a pull request.

Photo Credit: Veere: tools, by docman, CC BY-NC 2.0

Spring Cleaning: Alfresco Developer Series Tutorials Get an Update

Over the weekend I completed a major update to the Alfresco Developer Series Alfresco Tutorials. The improvements are aimed at making it easier on new learners by simplifying each tutorial’s project structure and by making that structure and the module naming match the default structure and naming conventions used by version 3.0.1 of the SDK.

I made the following improvements across all tutorials:

  1. Upgrade all projects to Alfresco SDK 3.0.1. This was easy–it was a one line change because the tutorials were already at 3.0.0.
  2. Refactored all projects to use the “all-in-one” archetype. This was a bit more painful, but it needed to be done. More on this in a minute.
  3. Removed the old “common” projects, which were there because I needed JARs of certain common classes so they could be used as dependencies across tutorials. With SDK 3.0.x that’s no longer necessary.
  4. Renamed repo tier and share tier modules to match the defaults for SDK 3.0.1. I hate that the repo tier and Share tier modules have “jar” in the name because no one should be building JARs to deploy to their production Alfresco server, but I decided it was less confusing for developers trying to follow along.
  5. Changed all tutorial project module versions to be major.minor instead of major.minor.patch. This is another minor annoyance of the current SDK–the default should be major.minor.patch. But I wanted the tutorials to be consistent with the SDK defaults so what-are-ya-gonna-do.
  6. Refactored old SDK 2.0.x integration tests to be compatible with SDK 3.0.x.

The move to the all-in-one archetype was a big one. I don’t always use the all-in-one archetype, particularly if I know I’m not going to need to make Share customizations. But the tutorials have Share customizations in all but one case.

Another reason to use two projects rather than all-in-one is because using two projects allows you to run the repo on one Tomcat and the Share WAR on another. When focusing on Share development, it’s nice to not have to restart the entire repo just to pick up changes. With JRebel, which I’ve been using for the last year, restarts aren’t necessary as often, so running separate Tomcats is less of a necessity. Plus, one project is easier on the tutorial reader.

The all-in-one setup also gives you an “integration-tests” module. When Alfresco upgraded from SDK 2.x to 3.x, the old way of doing integration tests broke. To run integration-tests in SDK 3.x you really need that integration-tests module, but it is not provided when you use the “platform-jar” archetype. You can add it back, as I recently did for the ACL Templates project, but I didn’t want tutorial readers to have to do that.

In the end, I figured it was worth restructuring all of the tutorials to use “all-in-one” for the above reasons and just to simplify the whole thing.

Incidentally, if you aren’t writing integration tests for your add-ons, you really ought to. The SDK comes with samples to get you started. And if you are using JRebel, you can stay productive. You basically just fire up the embedded Tomcat server, which deploys your AMPs (and your integration tests) to the alfresco and share WAR files and starts up the server. Then, you can make changes to your classes and your tests and JRebel will sync those changes without a restart. When you run the integration tests from your IDE, they will look for a running Alfresco instance and remotely invoke your tests for you on the running server.

I still need to port my integration tests to the 3.0.x way of doing things in several of my open source Alfresco add-on projects, but at least the tutorials are taken care of.

These updates were a lot of work, but I continue to get feedback from readers all over the world that the tutorials are helpful (thanks for that, BTW!), so I want them to stay current.

I may have missed a thing or two. As always, if you find something wrong, please create an issue on GitHub, or, better yet, a pull request.

Photo Credit: Cleaning, by Bob Jagendorf

5 rules you must follow on every Alfresco project

I know that people are often thrown into an Alfresco project having never worked with it before. And I know that the platform is broad and the learning curve is steep. But there are some rules you simply have to follow when you make customizations or you could be creating a costly mess.

The single most important one is to use the extension mechanism. Let me convince you why it’s so important, then I’ll list the rest of the top five rules you must follow when customizing Alfresco.

All-too-often, people jump right in to hacking the files that are part of the distributed WARs. I see examples of it in the forums and other community channels and I see it in client projects. Not every once-in-a-while. All. Of. The. Time.

If you’ve stumbled on to this blog post because you are embarking on your first Alfresco project, let this be the one thing you take to heart: The extension mechanism is not optional. You must use it. If you ignore this advice and begin making changes to the files shipped with Alfresco you are entering a world of pain.

The extension points in Alfresco allow you to change just about every aspect of Alfresco Share and the underlying repository without touching a single file shipped with the product. And you can do so in a way that can be repeated as you move from environment to environment or when you need to re-apply your customizations after an upgrade.

“But I am too busy,” you say. “This needs to be done yesterday!”, you say. “I know JavaScript. I’m just going to make some tweaks to these components and that’s it. What’s the big deal?”

Has your Saturday Morning Self ever been really angry at things your Friday Night Self did without giving much consideration to the consequences? That’s what you’re doing when you start making changes to those files directly. Yes, it works, but you’ll be sorry eventually.

As soon as you change one of those files you’ve made it difficult or impossible to reliably set up the same software given a clean WAR. This makes it hard to:

  • Migrate your code, because it is hard to tell what’s changed across the many nooks and crannies of the Alfresco and Share WARs.
  • Determine whether problems you are seeing are Alfresco bugs or your bugs, because you can’t easily remove your customizations to get back to a vanilla distribution.
  • Perform upgrades, because you can’t simply drop in the new WARs and re-apply your customizations.

People ask for best practices around customizing Alfresco. Using the extension mechanism isn’t a “best practice”–it’s a rule. It’s like saying “Don’t cross the foul line” is a “best practice” when bowling. It’s not a best practice, it’s a rule.

So, to repeat, the first rule that you have to abide by is:

  1. Use the extension mechanism. Don’t touch a single file that was shipped inside alfresco.war or share.war. If you think you need to make a customization that requires you to do that I can almost guarantee you are doing it wrong. The official docs explain how to develop extensions.

Rounding out the top five:

  1. Get your own content model. Don’t add to Alfresco’s out-of-the-box content model XML or the examples that ship with the product. And don’t just copy-and-paste other models you find in tutorials. Those are just examples, people!
  2. Get your own namespace. Stay out of Alfresco’s namespace altogether. Don’t put your own web scripts in the existing Alfresco web script package structure. Don’t put your Java classes in Alfresco’s package structure. It’s called a “namespace”. It’s for your name and it keeps your stuff separate from everyone else’s.
  3. Package your customizations as an AMP. Change the structure of the AMP if you want–the tool allows that–but use an AMP. Seriously, I know there are problems with AMPs, but this is what we’re all using these days in the Alfresco world. Ideally you’ll have one for your “repo” tier changes and one for your “share” tier changes. An AMP gives you a nice little bundle you can hand to an Alfresco administrator and simply say, “Apply this AMP” and they’ll know exactly what to do with it.
  4. Create a repeatable build for your project. I don’t care what you use to do this, just use something, anything, to automate your build. If a blindfolded monkey can’t produce a working AMP from your source code you’re not done setting up your project yet. It’s frustrating that this has to be called out, because it should be as natural to a developer as breathing, but, alas, it does.

The Alfresco Maven SDK can really help you with all of these. If you use it to bootstrap your project, and then only make changes to the files in your project, you’re there. If you need help getting started with the Alfresco Maven SDK, read this.

These are the rules. They are non-negotiable. The rest of your code can be on the front page of The Daily WTF but if you stick to these rules at a minimum, you, your team, and everyone that comes after you will lead a much less stressful existence.

You might also be interested in my presentation, “What Every Developer Should Know About Alfresco“. And take a look at the lightning talk Peter Monks gave at last year’s Alfresco Summit which covers advice for building Alfresco modules.


How I successfully studied for the Alfresco Certified Engineer Exam

Back in March I blogged about why I took the Alfresco Certified Administrator exam (post). Today I passed the Alfresco Certified Engineer exam. I took it for the same reasons I took the ACA exam, as outlined in that post, so in this post, I thought I’d share how I studied for the test.

Let me start off with a complaint: There is nowhere I could find that describes which specific version of Alfresco the test covers. This wasn’t that big of a deal for the ACA exam, but for the ACE exam, I felt a little apprehensive not knowing.

I know Alfresco probably doesn’t want to lock the exam version to an Alfresco version. But the blueprint really needs to give people some idea. Ultimately, I decided 4.1 was a safe bet.

I can’t tell you what was on the test, but I can tell you how I studied.

First, review the blueprint

The exam blueprint is the only place that gives you hints as to what’s on the test. If you look at the blueprint, you’ll see that the test is divided into five areas: Architectural Core, Repository Customization, Web Scripting, UI Customization, and Alfresco API.

The blueprint breaks down each of those five areas into topics, but they are still pretty broad. Some of them helped me figure out what to review and some of them didn’t. For example, under Architectural Core, topics like “Repository”, “Subsystems”, and “Database” were too vague to be that helpful in guiding my study plans.

Next, identify your focus areas

Looking at the blueprint, most of those topics have been in the product since the early days and haven’t changed much. I figured I could take the test cold and pass those. But Share Configuration and Customization has changed here and there between releases. With a lot of different ways to do things, and ample opportunity for testing around minutiae, I figured this would be where I’d need to spend most of my study time. I also wanted to spend time reviewing the various API’s listed under Architectural Core because I typically just look those up rather than commit the details to memory.

To validate where I thought my focus areas should be I took the sample test on the blueprint page, which was helpful.

Now, study

For Architectural Core, I spent most of my time reviewing the list of public services in the Foundation API found in Appendix A of the Alfresco Developer Guide, the JavaScript API (also in Appendix A as well as the official documentation), and the Freemarker Templating API documentation.

For the Repository Customization I figured I had most of that down cold and just spent a little time reviewing Activiti BPM XML and associated workflow content models. The workflow tutorial on this site is one place with sample workflows to review and obviously the out-of-the-box workflows are also good examples.

According to the blueprint, the UI Customization section is now focused entirely on Alfresco Share, so I didn’t spend any time reviewing Alfresco Explorer customization. Instead, I read through the Share Configuration and Share Customization sections of the documentation. There are now tutorials on Share Customization in the Alfresco docs so I went through those again just to make sure everything was fresh. The Share configuration examples in my custom content types tutorial are another resource.

The Alfresco API section consists of questions about the Alfresco REST API and CMIS. This is only 5% of the test so I spent no time reviewing this. I also ignored Web Scripts, figuring my existing knowledge was good enough.

After studying the resources in my focus areas I took the sample test once more. It’s always the same set of questions, so taking it repeatedly isn’t a great way to prove your readiness, but at least you know you won’t miss those questions if they show up on the real test.

Feel ready? Go for it

If you get paid to work with Alfresco, you really ought to take this exam (and the ACA exam). Obviously, what I’ve reviewed here is a study plan for someone who has significant experience with the platform doing real world projects. If you are new to Alfresco you’ll have to adjust your plan and preparation time accordingly. Better yet, get a few projects under your belt first. I think it would be tough for someone with no practical experience to pass the test with any amount of study time, which is the whole point.

So there you go, that’s how I studied. Your mileage will vary based on what your focus areas need to be. Now go hit the books!

New tutorial on Share customization with Alfresco Aikau

Alfresco community member, Ole Hejlskov (ohej on IRC), has just published a wonderful tutorial on customizing Alfresco Share with the new Alfresco Aikau framework.

You may have seen one of Dave Draper’s recent blog posts introducing the new framework. Ole’s tutorial is the next step you should take in order to understand the framework and how it can be used to make tweaks or additions to Alfresco Share.

I was happy to see Ole follow my example for the format and publication of his tutorial and that he’s made both the tutorial itself and the source code available on GitHub for anyone that wants to make improvements.

Thanks for the hard work and the great tutorial, Ole!

Five steps you can use to figure out how anything in Alfresco Share really works

A forums user recently asked how to use the “quick share” feature from their own code. The implementation is easy to figure out, but I thought illustrating the steps you should use to dig into it would be instructive, because it is the same general pattern you would follow to learn how anything works in Alfresco.

What is Quick Share?

Quick Share makes it easy for end-users to share any document with anyone whether or not that person is a member of a site or has specific permissions on a document. Clicking the “Share” link in the document library or document details displays a dialog with a shortcut URL that will allow anyone to see a preview of the document. If that person also has access to the document, they can optionally download the document as well.

The Quick Share feature in Alfresco Share


How does this work behind-the-scenes? Let me show you how to figure that out. These steps can be used to demystify any Share-based functionality you need to learn more about.

Step 1: Determine the call Share makes to the repository

Share is just a front-end web application. It always talks to the repository via HTTP. Step 1 is to take advantage of that. Use Firebug or a similar browser-based client-side debugging tool to watch the network traffic between Share and the repository. If you turn that on you’ll see that when you click “Share” the browser makes a POST to:

http://localhost:8080/share/proxy/alfresco/api/internal/shared/share/workspace/SpacesStore/f70e2505-5002-42b7-a71b-2e09aca0c2d0

What comes back is JSON representing the quick share ID:

{
"sharedId": "oD9wUfV_SPS9eG-CFEpwbQ"
}

The first part of that URL, “/share/proxy/” is the Share proxy. It simply forwards the request on to the repository tier. In this case that’s a web script residing at “/alfresco/api/internal/shared/share”. The rest of the URL is the node reference of the node being shared.

As a side-note, unsharing works similarly. Share sends a DELETE to http://localhost:8080/share/proxy/alfresco/api/internal/shared/unshare/oD9wUfV_SPS9eG-CFEpwbQ

That returns JSON with the return flag:

{
"success" : true
}

So now you know how Share interacts with the repository. The next step is to dig into the repository tier implementation.

Step 2: Look at the repository web script

Now that you know the repository web script URL you can go to the web script console, http://localhost:8080/alfresco/s/index, to learn more about the web script. I find searching by URI to be easiest. Here’s the web script in the list:

web-script-index

Clicking on that link shows high-level information about the web script. Make note of this web script’s lifecycle–it is set to “internal”. That means you shouldn’t call it from your own applications or customizations. If you do, you may be creating a future maintenance headache because the web script may change without warning.

In this case, we don’t want to call the web script, we want to know what the web script is doing. Clicking on the web script ID will tell you more about how it is implemented. Here’s the URL where you’ll end up:

http://localhost:8080/alfresco/s/script/org/alfresco/repository/quickshare/share.post

This page is really helpful because it shows you the details about the web script implementation, including its views and controllers.

Web Script Implementation Details

In this case, the web script uses a Java controller implemented in the following class:
org.alfresco.repo.web.scripts.quickshare.ShareContentPost

The next step is to dig into the web script implementation.

Step 3: Read the source code for the implementation

If you search through your Alfresco source code you’ll find ShareContentPost.java. It’s a very simple web script. Here’s the line that does the work:

QuickShareDTO dto = quickShareService.shareContent(nodeRef);

Cool, so there is a QuickShareService. I’m going to make a time-saving leap here which is to assume that anything named like FooService is likely defined as a Spring bean that I can inject in my own code.

Step 4: Find the QuickShareService bean

If you’re going to write some Java code that leverages the QuickShareService you’ll probably want to see the Spring bean configuration for that bean. To find that, go into $TOMCAT_HOME/webapps/alfresco/WEB-INF/classes/alfresco and do a grep for QuickShareService. You’ll see that it is defined in quickshare-services-context.xml.

Now you have a Spring bean ID you can use as a dependency in your code.

Step 5: Understand the content model

You might choose to do this in an earlier step, but if you haven’t already, you should use the node browser in Share to see what happens to a node when it is shared just in case you need to make use of any of that information. By doing that you’ll see that a shared node has an aspect called qshare:shared. When it gets shared, the qshare:sharedId and qshare:sharedBy properties get set. In this example, the QuickShareService handles that for you–you shouldn’t have to set those manually. But it is good to know those properties are there in case you need them.

If you needed to learn more about the content model you could grep for that aspect ID, qshare:shared, in $TOMCAT_HOME/webapps/alfresco/WEB-INF/classes/alfresco/model to figure out where the model XML is.

Now you have everything you need to make use of this functionality in your own code. For example, if you wanted to create a rule action that automatically shared everything matching a certain criteria, you could easily do that by injecting the QuickShareService into your action and then calling the shareContent() method (see my actions tutorial).

This example covered the Alfresco Quick Share feature in the Alfresco Share web client, but you can use these steps to dig into any functionality in Alfresco Share that you need to deconstruct.